
An article by Bullet.
I’ve been wanting to convert the Farley to tubeless for a long time now but wasn’t confident that the process was going to be as easy and reliable as I wanted. I like to over complicate things and feel like a simple solution is generally the best. As it turns out the process was very easy, relatively inexpensive, and the results have been exceptional. Here is how I did it.
Your parts list is simply; a roll of Gorilla Tape ($14.99), a set of Stan’s tubeless valve stems ($12.99), and a 16 ounce bottle of Stan’s sealant ($14.99). You may need a set of tire levers, and an air compressor is pretty important for airing up your tires quickly. I’m not sure you can do this without one.
Step 1 – Remove your tube and tire. If you’re using a standard rim strip make sure it properly lines up in the center of the rim. You can trim it back with a razor if it has been stretched out of shape. I have green duck tape lining my rim to get some color coming through the holes in my Rolling Darrels.
(Removing the valve core to deflate the tube will greatly speed up the process)

Step 2 – Line the rim with Gorilla Tape. I used the 2.88” wide black version. It spanned the rim nicely and created a nice seal. I overlapped the tape a couple inches to make sure I didn’t have a weak point where I could get a leak. You will need to make a hole in the tape to fit your valve stem. I used a leather hole punch working from the inside of the rim and cut a perfect hole.


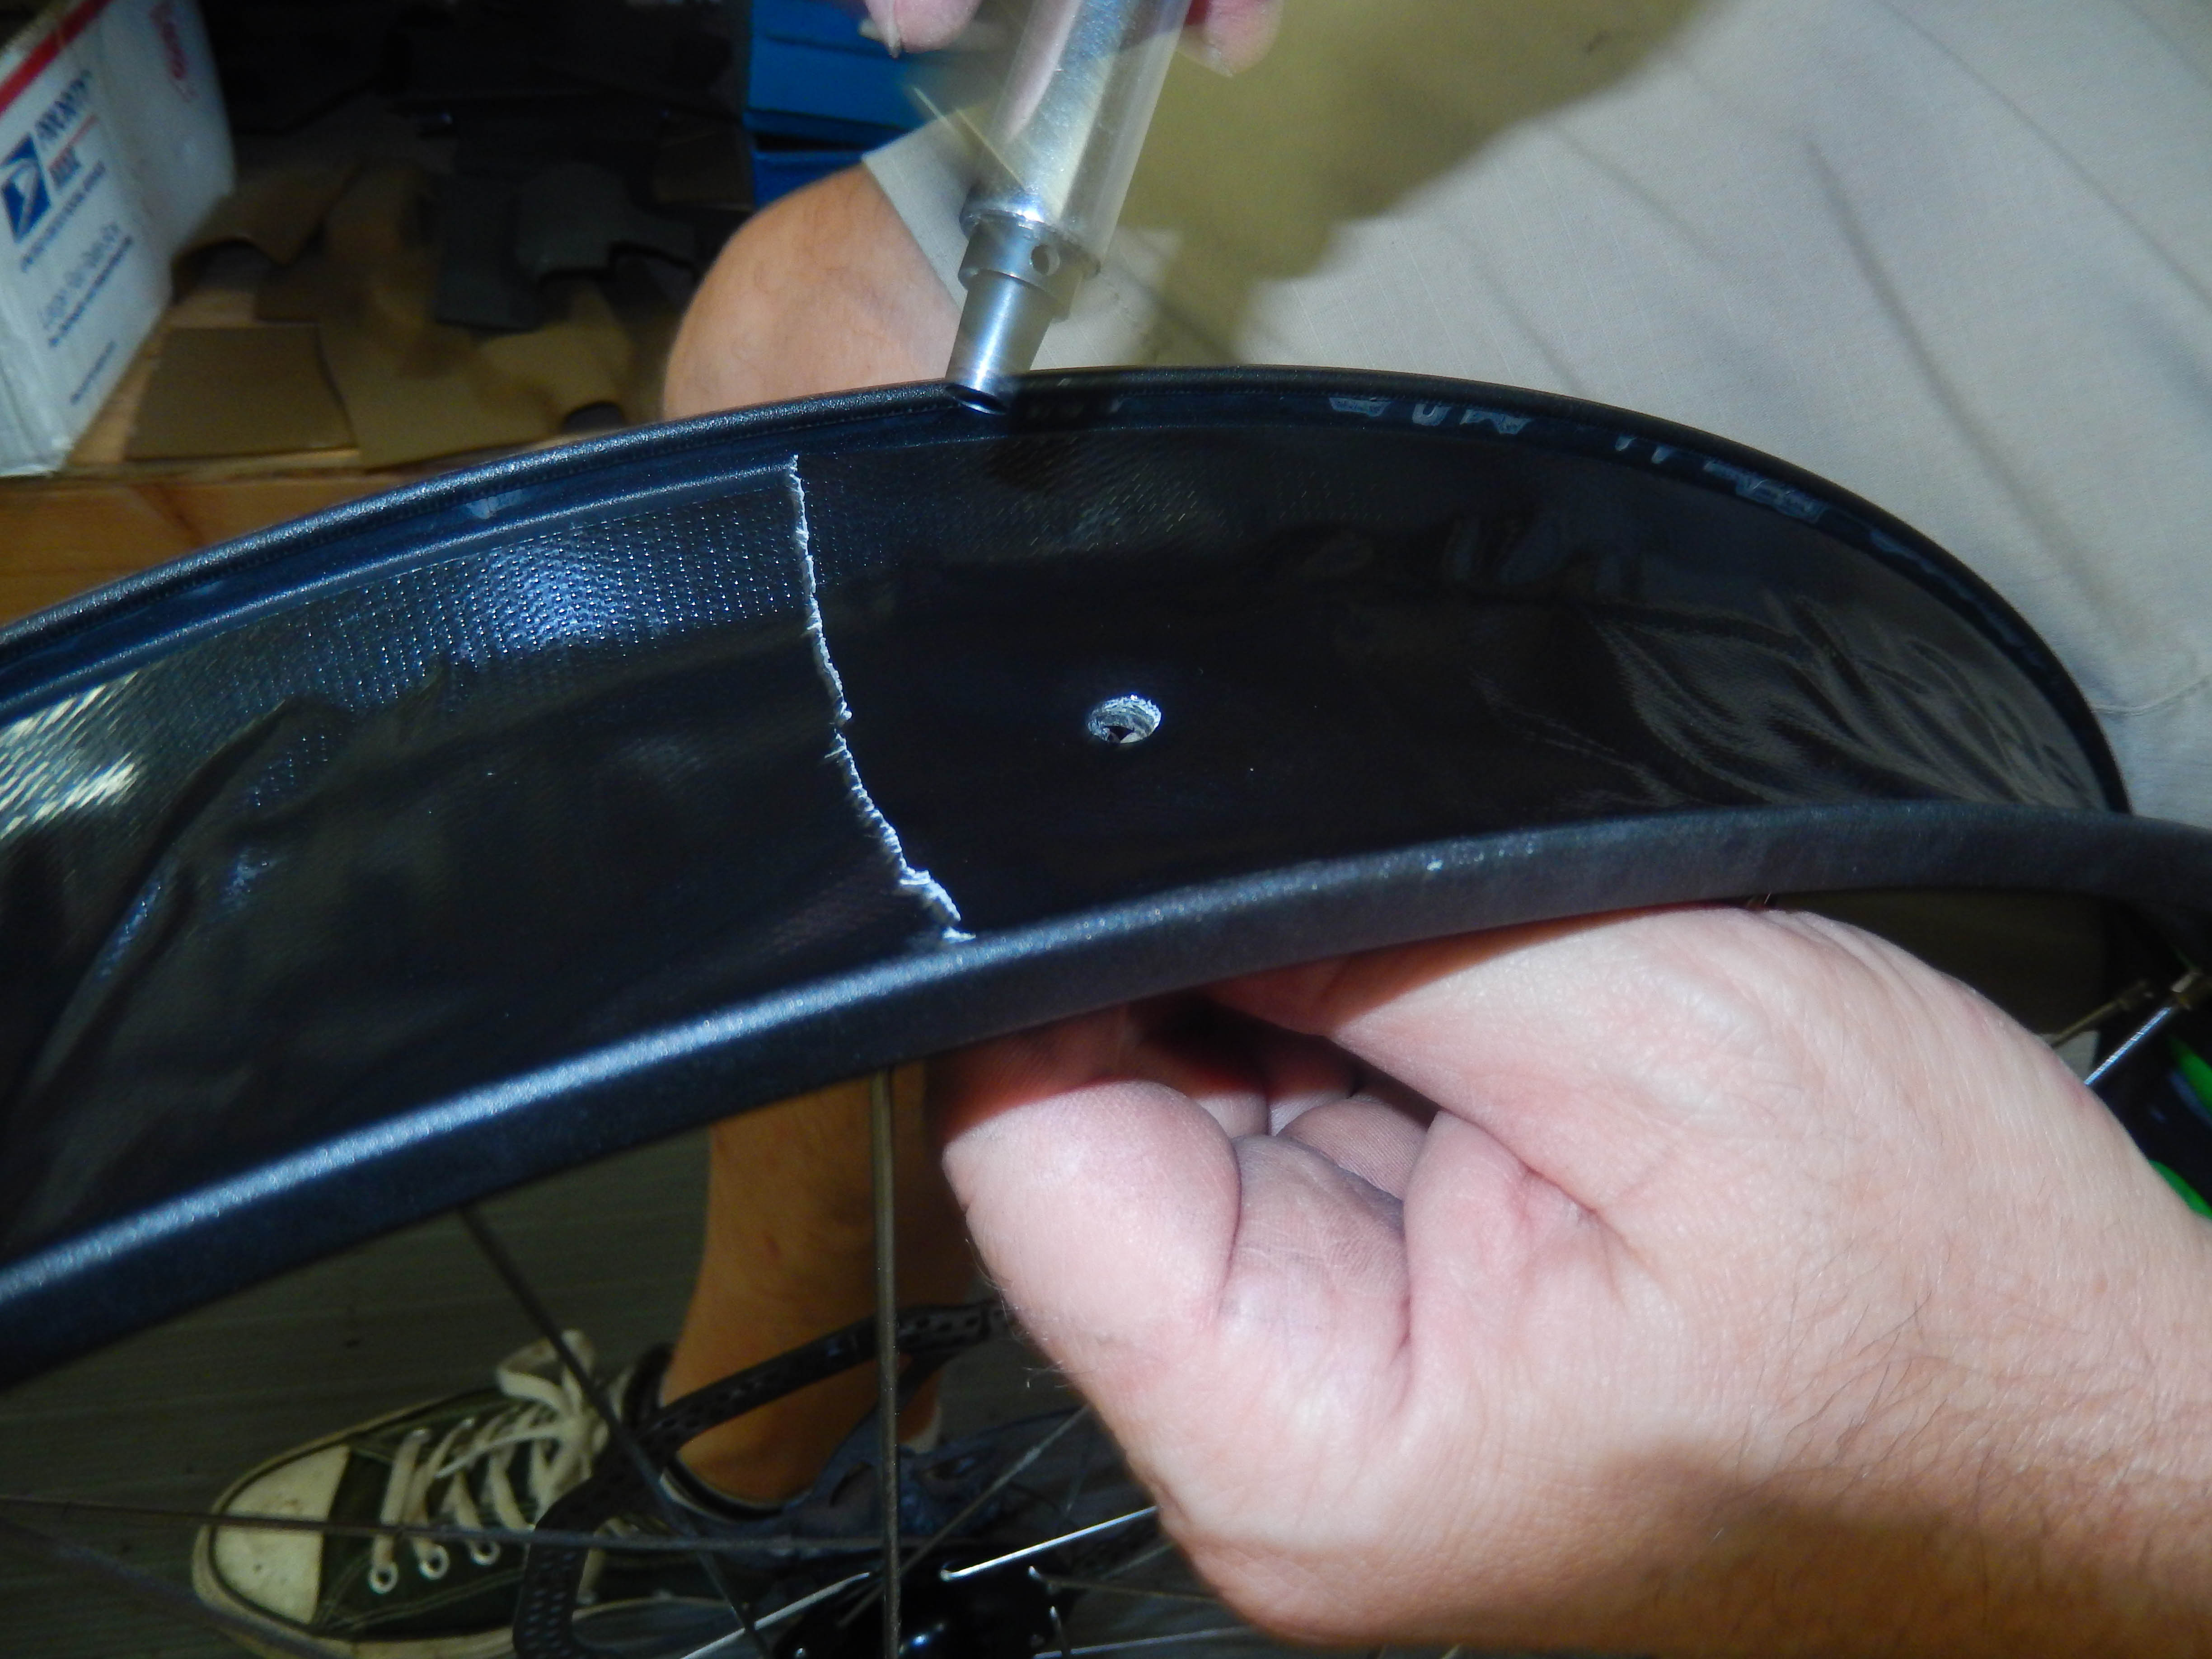
Step 3 – Reinstall your tire and tube. Inflate the tire and let the bead properly seat on both sides all the way around, this step is important as it will ensure that the Gorilla Tape is pressed into every nook and cranny in the rim tightly before you try to seal everything. After letting it sit for a few minutes to ensure everything settles in nicely, remove the tube making sure you only break the bead on one side of the tire. This way when you inflate it without the tube you only have one side of the tire that needs to be seated.
Step 4 – Install your Stan’s tubeless valve stem. I snugged up the locking ring with some pliers but was careful not to over tighten it. Finger tight is probably adequate but I just wanted to be sure I wasn’t going to get any leaking there. Place your wheel on a flat surface with the loose bead down. Gravity will help you out here. Air it up and listen for the bead to pop into place. Make sure to examine the bead to make sure you have a good even seat all the way around.

Step 5 – Remove the valve core and let the tire deflate. Make sure the seated bead stays intact. It should be pretty well placed by this point but rough handling at this point could create a potential problem. You will need to add 8 ounces of Stan’s sealant in each tire so half the bottle. Using a piece of hose on the end of the bottle that fits tightly over the valve stem will make this process nice and clean. Once the sealant has been added reinstall the valve core and air up the tire and go for a ride.

Riding your bike immediately after will help get the sealant worked into all the little flexible places air likes to escape from. I left my tire a bit over inflated, about 12-13 pounds, during my 12-mile ride. I figured this will help spread the sealant better and if I did have any little leaks I had a some room before I would have to break out the pump and bring them back up. As it turns out they held that pressure until the next morning when I dropped them back down to 9 pounds (that’s where I like them for my regular summer days trail riding).
I wanted to report the weight savings, if any, that I got from losing the tubes but I don’t think the crappy scale I used was being honest with me. It reported a loss of nearly 14 ounces on my front tire! I don’t think that is possible after adding 8 ounces of sealant. I think overall my wheels are probably a bit lighter or at least at a break even point after removing the tubes.
The ride is definitely improved. I don’t know how to describe it other than it seems to be softer. The biggest improvement will be in flat resistance. Since I’ve started riding the Farley in October I’ve had two flats. I hit a cactus under the snow on the side of a trail last fall that flattened the front tire and pinch flat on the rear this Spring riding dirt trails. Not having to deal with that issue on long rides and backcountry tours will be the biggest improvement.
Here is a video where I show how I did everything.

Love your posts, thanks. Question- how many pounds of air do you use in your tires?
For riding in on dry dirt trails I run between 9 and 10 pounds. I the snow it is more like 5 pounds and sometimes less depending on the conditions.
My setup was very similar. A couple of other tips that help. Remove the valve core for the initial inflation after the tube removal. After it pops in place, let the air back out and install sealant. I put the wheel on a bucket and flipped it back and forth a few times before the ride to get sealant to coat the sidewalls. I’ve been riding mine since april and even did the White Rim as a bikepacking trip.
I am actually planning a White Rim trip with my scouts next year. Any advice? I haven’t done it before so we are kind of going into blind.
Reblogged this on Kite*Surf*Bike*Rambling and commented:
Need to go fat tubeless – here is how it is done
I am not sure what the present thoughts are on fat tire tubeless but let me share my thoughts. Your duct tape is at least a few ounces I suspect, maybe 3 oz for the thinner transparent duct tape. In addition to that you add 8 fl oz of sealant, probably close to 8 oz of weight. That totals to at least 11 oz of weight or 312 gms.
I have been successfully using bontager 26×2.5-2.8 tubes in my 26×4.0 tires on 80mm wide R. Darrels. They weigh only 285 gms. Also I just purchased a Surly 26×3-4.8 tube that is thinner, 0.8mm and it weighs 330 gms. I think the tube manufacturers and riders will soon realize that 0.5mm is probably thick enough for 8-12psi of pressurization so we will be at less than 200 gms soon.
Don’t you think this is the future? I remember using those super thin latex tubes in sew-up tires. They probably were 0.5mm thick or less and we inflated them to 100psi.
Craig
As there are quite a few different sizes of Stan’s valve stems… I’m curious which size are people using for their conversions?